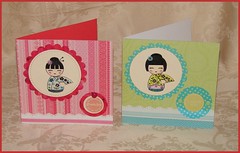
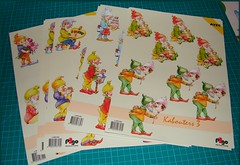
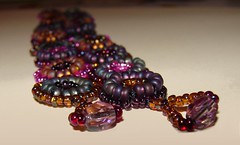
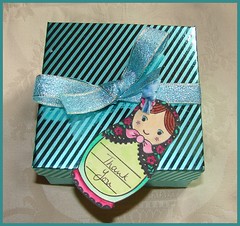
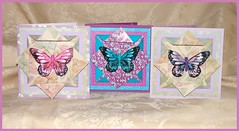
Just uploaded 20 new pictures onto flickr. A few weeks without the ability to upload has left me a long way behind with uploading my crafting pics. This is one batch done anyway. More soon I hope. :) Click on the pic to view the others on flickr.
Thursday, December 31, 2009
Sunday, December 13, 2009
Hornsea
Hi, I've been offline for a while as I couldnt get photos off my camera card! Anyway, I now have a good work-around solution and shall be back in the land of the living soon.
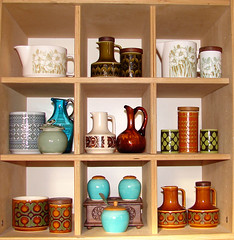
In the meantime, here is my new obsessional hoarding collection :)
x
In the meantime, here is my new obsessional hoarding collection :)
x
Tuesday, October 13, 2009
Earring Tutorial
I wanted to send an earring idea to my friend Toni so I have popped it on here, with a bit of a picture to help explain :)
The parts on the right are all that is needed to make the earring on the left. ( There should be five headpins though, I seem to have lost one..)
Recipe.
Put one bead and one spacer on a headpin four times. Put loops at the top of each one making sure that....,
- One has virtually know spare head pin visible, so the loop is up tight to the spacer bead. ( Call this "A")
- Two are the same length (These are "B"s) and the final one is a little bit longer.(C)
Cut the head off one of the remaining headpins and make one end into a loop. Thread on, in order, B, spacer bead, jump ring, C, jumpring, spacer bead, B
.
Now place a loop at the other end of the head pin ( Try and get all the loops facing the same way) and then bend it into a circle. I used a pen ( pictured here.) and just wrapped it around.
Open up a jump ring and slide on, in order,
-One end of the loop
- A
- The other end of the loop
-Earring hook
Close the jump ring and that's it! :)
Monday, August 24, 2009
Four stages of an arty card.
1. Sketch in pencil.
2. Pen outlines.
3. Watercolour pencil.
4. Chop, frame and mount on card.
Commissioned card for someone that likes walking/hiking.
2. Pen outlines.
3. Watercolour pencil.
4. Chop, frame and mount on card.
Commissioned card for someone that likes walking/hiking.
Eight thank you cards.
My partner wanted some thank you cards to send after his birthday. Here they are, based on the bird in the Basic Grey>urban prairie>meadow paper.....
Saturday, August 22, 2009
Commissioned Collection
Recently been working on this commissioned set of cards. I thought this would give potential customers an idea of what a set of cards might look like... all different, all sizes, lots of thought put into each one so it is suitable for the intended, etc.
More photos of the cards on Flickr, here!
More photos of the cards on Flickr, here!
Thursday, August 20, 2009
Pegloom
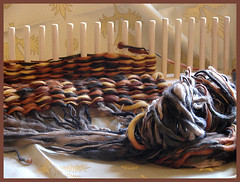
My friend T has bought me a very early Xmas present and here it is! A Peg Loom! I am currently looming a cushion cover in left over bits of wool from the knitty kitties.
It's extremely satisfying!
Thank you Toni ^_^
More pics later...
I saw some superb looming wool in Ipikin, in Much Wenlock. It's a beautiful wool shop, absolutely crammed with different kinds of wool, I cant find a website for it though, but i'll keep looking :)
It's extremely satisfying!
Thank you Toni ^_^
More pics later...
I saw some superb looming wool in Ipikin, in Much Wenlock. It's a beautiful wool shop, absolutely crammed with different kinds of wool, I cant find a website for it though, but i'll keep looking :)
Small blue bird factory
Making some toppers to match some new backing paper :)
Cards to follow later :)
Paper is Basic Grey> Urban prairie>Meadow.
Cards to follow later :)
Paper is Basic Grey> Urban prairie>Meadow.
Tuesday, August 04, 2009
Happy Birthday with Tent.
I got this decoupage at a craft fayre earlier in the year. My friends were very rude about it, and decided that the stall owners had taken bets earlier in the day as to whether anyone would buy it! :) However..this is perfect for the intended recipient, even down to the absconding toddler! :)
Happy Birthday Sister.
For my sister-in-law, the flowers are iron-on appliqué.
I used this layout (exactly) the other day for a card, but made two of them so I could use it with a different topper later on. It's part of my effort to work faster and better ;)
I used this layout (exactly) the other day for a card, but made two of them so I could use it with a different topper later on. It's part of my effort to work faster and better ;)
Golden Anniversary.
Recipe: This card was made out of an A4 sheet of gold card, white the other side. I designed a pattern on the PC* and printed it onto the reverse side of the card. A cut a diagonal down the card and did a tri-fold. The poem slots in the front pocket and could be removed and used as a book mark.
*I took a few clip art images ( microsoft) and combined them, and recoloured them, to form the picture. I should have started it from scratch myself, but this was far faster.
*I took a few clip art images ( microsoft) and combined them, and recoloured them, to form the picture. I should have started it from scratch myself, but this was far faster.
Chess puzzle card.
Card for my other half, off his mother.
The puzzle is real, "Black to move and win."
Just printed the topper using the PC and then mounted on blue mirri card.
The puzzle is real, "Black to move and win."
Just printed the topper using the PC and then mounted on blue mirri card.
Exploding box Card
Made for my friend Susan. First go at one. Used lots of "Smirk" goodies including the ribbons.
Followed a template I purchased a while ago. Just drew around the pieces.
The bright pink inner layer is made with a felt pen base and then inks dabbed over the top. It was nice to stamp onto it in black.
Followed a template I purchased a while ago. Just drew around the pieces.
The bright pink inner layer is made with a felt pen base and then inks dabbed over the top. It was nice to stamp onto it in black.
Happy New Home.
Idea in "Papercraft Inspirations", reworked a bit to fit my supplies.
I like to have a go at the suggestions in the crafty mags, it pushes me to make something different and learn how to do something new :)
The flowers are made of tiny flower shaped buttons that I purchased eons ago, and have never found the right project for.
I like to have a go at the suggestions in the crafty mags, it pushes me to make something different and learn how to do something new :)
The flowers are made of tiny flower shaped buttons that I purchased eons ago, and have never found the right project for.
Saturday, August 01, 2009
Thanks Teacher
Not sure I like it, but, I think its important to post some disasters on my blog! Actually it wasn't really a disaster, it was a commission, and the person I made it for liked it, and really, that's all that matters :)
I did enjoy doing the white embossing on the dark green background colour, and it was great to find a use for a home made button!!!! ^_^
The teacher was male, so I did struggle a bit to think what embellishments are always fine for men.
Suggestions and Comments welcome ;)
I did enjoy doing the white embossing on the dark green background colour, and it was great to find a use for a home made button!!!! ^_^
The teacher was male, so I did struggle a bit to think what embellishments are always fine for men.
Suggestions and Comments welcome ;)
Round Cards
Had a couple of commissions for Birthday Cards, so took the opportunity to have a go at a circular card. This pattern is based on an idea that appears on an advert in one of the craft mags!
Petals, leaves, etc individually cut from what I think is a K & Co 12x12 paper.
Petals, leaves, etc individually cut from what I think is a K & Co 12x12 paper.
Anniversary Cross Stitch Card
Commissioned Card for an Anniversary. Cross stitch pattern is out of my 2 hour Cross Stitch book, I thought it would be a breeze and I'd get two made, but alas, it's me that's not speedy, not the pattern!
Nestability scalloped frame around the cross stitch, the shading on the title is in pencil, I couldn't think of a better way to do it at the time :)
Nestability scalloped frame around the cross stitch, the shading on the title is in pencil, I couldn't think of a better way to do it at the time :)
Wednesday, July 22, 2009
Yet another wedding card...
This one took me all day to make, so I dont think I shall be making it again.. I am not very decisive and keep thinking I might find a paper or button or stamp that would match better than the one I have just found, so it takes an age to settle on the final colour combo.
Heart border Fiskas stamp, purchased when there was 70% off their range, is really nice on this card... I shall have to remember to use it more often. :)
Heart border Fiskas stamp, purchased when there was 70% off their range, is really nice on this card... I shall have to remember to use it more often. :)
Lesley Anne Ivory Cat
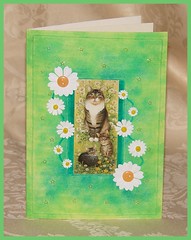
A really nice Lesley Anne Ivory topper and paper set came with one of the magazines this month. They are almost too nice to use :) The daisies came out well so I might use them again on another project. These card blanks are actually pink, so I coloured them with green pen and then dabbed a few different shades of green ink over the top.
This probably is giving away how incredibly short of card stock I am. Craft Woes.
This probably is giving away how incredibly short of card stock I am. Craft Woes.
Wedding Cake Card
One of the many layouts for wedding cards I am trying out. Very easy this one...
I've seen lots of people using white embossing on things recently so wanted to have a go myself, particularly white on cream. I think it looks ok.. for weddings atleast. :)
I've seen lots of people using white embossing on things recently so wanted to have a go myself, particularly white on cream. I think it looks ok.. for weddings atleast. :)
3 fold Wedding cards
Have alot of orders in for wedding cards at the moment, and my friend found me an ace book called "Making Wedding Cards."* This is one of the designs in the book. I dont think my cutting is quite tidy enough to do the card justice.
I could do with making a more robust version of this card and shall probably revisit this design when I have worked out how to tweak it.
*My copy only cost me 99p new, so don't go forking it out £12.99 for it, check out a garden centre cheapy book table or let me know and I could send you a copy.
I could do with making a more robust version of this card and shall probably revisit this design when I have worked out how to tweak it.
*My copy only cost me 99p new, so don't go forking it out £12.99 for it, check out a garden centre cheapy book table or let me know and I could send you a copy.
Sorry!
My favourite card out of recent makes. I just wanted to use up the guilty puppy decoupage really :)
Just for once I put in some effort on the interior of the card, and it really did make a big difference to the quality side of things.
Inner layering is chalked to give blendy effect.
Just for once I put in some effort on the interior of the card, and it really did make a big difference to the quality side of things.
Inner layering is chalked to give blendy effect.
Wednesday, July 08, 2009
Happy 18th Nephew
Commission for the same 18 year old as the gardening card I made. I hope they look really different! :D
This is what happens when I actually sit down with an idea in mind and then try and recreate it. Normally I just work with one item that stimulates the ideas for the rest of the card... but with this one I kinda had an idea to work with.
Recipe:
The sheet music printed for free online.
On the computer I made the top two rows of notes, imposed a letter on them, and then printed them out. Cut out and foam padded on.
The bottom layer of notes are printed again, slightly bigger, and then the letters are brads.
This is three levels, so I had enough room to hide the backs of the brads, and inset the knotted b&w string.
Finished off with a length of the b&w string at the bottom.
I dont often do anything in monochrome, so this was a bit of a departure for me :)
Deepest Sympathy
Commission. Very serious, very clean, sympathy card. The lily is a decoupage piece.
Inside it says - Our thoughts and prayers are with you.
Inside it says - Our thoughts and prayers are with you.
Sow pleased you are feeling better.
Commission Card, following a recipe from one of the craft magazines.
I really must write down which magazine I take clippings from because I never remember by the time I use them, doh!
Nothing complicated in this, it was just in response to the message being sent - "So(w) pleased you are feeling better."
I really must write down which magazine I take clippings from because I never remember by the time I use them, doh!
Nothing complicated in this, it was just in response to the message being sent - "So(w) pleased you are feeling better."
Saturday, July 04, 2009
Wedding Invite Fold
Requested by Penny Wessenauer :) The fold I used for the wedding invites.
Dashed lines are valley folds, dash&spot lines are mountain folds.
I do not claim to own the rights to this, but its much faster that drawing it out by hand...
Dashed lines are valley folds, dash&spot lines are mountain folds.
I do not claim to own the rights to this, but its much faster that drawing it out by hand...
Grandson 18th.
In card business news...not that it really is a business but I have a feeling it could be... I am now doing more commission cards for special birthdays.
Here is one.
The order was "Grandson, 18th, likes Music and Gardening and is going to Uni to study chemistry."
I have to do another one for the same lad, but from his Auntie/Uncle... so I am thinking of doing a chemistry based one for that :)
Here is one.
The order was "Grandson, 18th, likes Music and Gardening and is going to Uni to study chemistry."
I have to do another one for the same lad, but from his Auntie/Uncle... so I am thinking of doing a chemistry based one for that :)
Great Horned Owl
When I sold my owl tiles, I offered the buyer the original art work that my tiles had been based on. I figured I should really make a copy of them before I got rid...its just my luck to realise I need them for something else later down the line. I have uploaded the six pencil sketches on to flickr to keep a copy safe.
Monday, June 29, 2009
80th
Commission card. To fit the remit : 80th, Lady who likes the piano. The piano keys are 3D but I dunno whether its going to make it a pain to post... also because I get worried about using black card, I've made cream inserts for inside, and a panel for the back, so its now super heavy too. Doh! :)
Recipe:
Keys created by cutting a large elongated leaf shape from cream paper, then slicing out spaces for the black keys and the gaps between the white keys. Black pen used to fill in gaps where needed. Then pasted onto black paper. Stardust pen to make keys sparkle.
Purple backing paper.
Curly green corners cut and stuck.
Punched flowers, with pearl gem centres.
"80 today" printed off the computer and cuttlebugged round. Musical Clef in background.
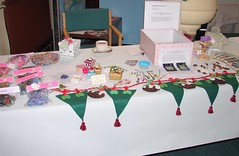
Craft Table at the Sale.
This was my main focus of effort for the Art and Crafts Sale. I made some new earrings ( most sold!) and plenty of phone charms (Always a good seller!) Sold lots of cards too.
Rachel also had some things to sell on the stall, superb felted things...I think I need to persuade her to set up an etsy shop.
Rachel also had some things to sell on the stall, superb felted things...I think I need to persuade her to set up an etsy shop.
Arts and Crafts Sale - Inside the Church
Wanted to include a couple of pics from the Art and Craft Sale last weekend! Lots of lovely paintings, quite a few I liked!
I entered my owl tiles into the auction and sold them! Wooot!
I also won the raffled picture.
It was a good day :)
I entered my owl tiles into the auction and sold them! Wooot!
I also won the raffled picture.
It was a good day :)
Happy New Home Card
So, sometimes I forget I could always just draw a card... This is all this is... tho I did cut and stick the wording on later, as I was going to do it raised, but in the end it just went on flat.
I am a bit heavy handed with my Stickles glitter at the moment ^_^
I am a bit heavy handed with my Stickles glitter at the moment ^_^
Friday, June 26, 2009
Wedding Invites
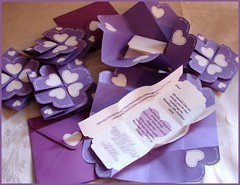
Finally got the wedding invites sorted for my friends C&D! The jacket to each invite is an origami fold, that twists as you open it to reveal the inner.
They are having a cream and purple wedding but I wasn't really given any other restrictions.
I made 57, plus a few spares incase of accidents :)
Recipe:
Origami folded square of purple paper. Small square of purple paper glued on back to reinforce the shape.
Cuttlebug cream heart in each section.(4)
Punched cream heart in each outer section. (4)
Add stitching detail to both sets of hearts.
"You are invited to..." writting, hand written around edge of card.
Inserts printed via computer, printed on cream paper.
Folded to fit the central square inside the origami jacket.
Purple stitching added to match outer card.
Cuttlebug heart with purple stitching stuck to the back of each purple envelope.
Also included were A4 map and hotel/b&b details.
Baby Card
Card for "Riley" my new almost nephew! :)
The baby is a "Jolly Nation" decoupage sheet, the patterned paper is the matching background supplied with it.
I edged the letter with blue ink and then used stickles sparkly glitter over the top, so it has the effect of blue glitter.
The baby is a "Jolly Nation" decoupage sheet, the patterned paper is the matching background supplied with it.
I edged the letter with blue ink and then used stickles sparkly glitter over the top, so it has the effect of blue glitter.
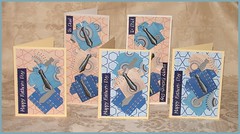
Father's Day Cards
My friend Su and I have discussed making these little shirts for ages, but never got round to actually doing it. She gave me some small silk ties she had purchased to go with the idea, so this father's day I actually got round to it.
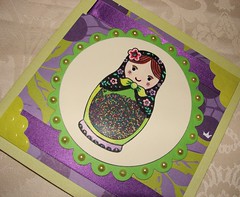
Russian Doll Shaker Card
This is my first go at a shaker card ( I think... I cant remember making one before..) and I am v.pleased with it.. I also think doing a circular version may have helped keep the little beads in!
Recipe: Hero Arts Stamp, coloured in, tummy area removed.
Cuttlebug circle shape around it.
Glue section of acetate to back of circle.
Carefully create a circle on the back with 3d foam tape. I made slits in the one side so it could be bent into the right shape.
Put accent beads into place.
Cuttlebug shape to fit behind the circle and glue behind.
Rest of card as normal.
Friday, June 05, 2009
New Baby Boy..
I am an Auntie Again! :) This is for my Mother-in-Law to send...
I made the bear myself..... I couldnt fine one the right size to stamp or cut out etc... I'm not happy with the spurting milk bit, but I needed something to fill the gap! I'd like to have another go at this card,..smooth out some of the problems! :)
I made the bear myself..... I couldnt fine one the right size to stamp or cut out etc... I'm not happy with the spurting milk bit, but I needed something to fill the gap! I'd like to have another go at this card,..smooth out some of the problems! :)
New Smirk Card
New Smirk Card finally motivated me to set up a "Smirk by Trimcraft" group on Flickr.. I am hoping to find some other people using the range...
http://www.flickr.com/groups/1138997@N23/
This was relatively quick.. Used the Smirk stamp and their paper..which is fabulous! :) "On your Birthday" was upcycled ;)
http://www.flickr.com/groups/1138997@N23/
This was relatively quick.. Used the Smirk stamp and their paper..which is fabulous! :) "On your Birthday" was upcycled ;)
Hero Arts Owl and Sqwirl
Another set of Hero Art Stamps! I loves them :) Just two little cards for the sale card box.
Just mat and layer using the cuttlebug and stamping on cream paper and colouring in with pencil crayons.
Also getting some good use out of my Sakura clear gloss pen, and the stardust pen... as well as Stickles stardust glitter glue. I would have all three in my "Craft essentials list." ^_^
Just mat and layer using the cuttlebug and stamping on cream paper and colouring in with pencil crayons.
Also getting some good use out of my Sakura clear gloss pen, and the stardust pen... as well as Stickles stardust glitter glue. I would have all three in my "Craft essentials list." ^_^
More kokeshi lovelyness...
Made two more kokeshi thank you cards to go into the card sale box at coffee morning. They are having an event mid June so I have to start to stock up that box!
Recipe: Sqaure card blank. Backing paper punched with edge punch to make fancy border, or using paper with mock fancy border. Vellum cut via cuttlebug, and circles. Kokeshi dolls printed with black ink on cream paper and then coloured in with pencil crayons. Embellished with flowers in their hair and fans in their hands.
Recipe: Sqaure card blank. Backing paper punched with edge punch to make fancy border, or using paper with mock fancy border. Vellum cut via cuttlebug, and circles. Kokeshi dolls printed with black ink on cream paper and then coloured in with pencil crayons. Embellished with flowers in their hair and fans in their hands.
Wednesday, May 20, 2009
Leprecons for Swapsies.
One of the cool things on Flickr is getting crafty contacts via your photos. It's been no effort to find some really cool people for inspiration and collaboration.
I am particularly pleased to have joined UK Etsy Swap Madness, where I can send my surplus craft items to other members and gain points to spend on items other people offer. Nifty idea and I have had some brilliant stuff out of it.
Today I am listing these sheets of "delightful" decoupage >_< *shudders* I kept one sheet, for St.Patricks day next year!
Wednesday, May 13, 2009
Overview pic
Less arty pic, more clear what it looks like. I just cant ignore the desire for clarity :)
Close up of Tamina bracelet.
Finally finished, the Tamina bracelet, from the kit from Spellbound beads.
Super keen now to try another kit, or may be this kit, with some of my own bead and design choices...
I am also trying to figure out a way to improve the fastening on this kit.....it looks simple, and pretty, but its just not safe enough to risk by it's self. It's going to be hard to alter it on this finished bracelet, but I might be able to make improvements for the next time. :)
Russian Doll Handbag Charm Sold!
Pleased to have another sale on etsy, I was sure I wasnt the only person to like handbag charms of an eclectic nature, at last I have proof! :)
This is a pic of the charm, in its wrapping, ready to go!
Picture of handbag charm.
Had a lovely mail back from the buyer too, its great to get some feedback! ^_^
This is a pic of the charm, in its wrapping, ready to go!
Picture of handbag charm.
Had a lovely mail back from the buyer too, its great to get some feedback! ^_^
Bracelet
Doing a bracelet kit I purchased at Spellbound beads in Lichfield. Really enjoying it...
It's actually alot further along than this now..I am attaching each small circle together..slowly! I might try the pattern again with some of my own choice of beads, tho it takes me quite a while, so I am not sure it would be profitable to sell them! :)
It's actually alot further along than this now..I am attaching each small circle together..slowly! I might try the pattern again with some of my own choice of beads, tho it takes me quite a while, so I am not sure it would be profitable to sell them! :)
New butterfly cards...
Purcased this butterflys from a florist some time ago.. been waiting for ages to make them.. They squish nice and flat, the extra bulk, provided by the folded design, keeps the butterfly safe.
Built as per the cards below, no changes.
Built as per the cards below, no changes.
Saturday, May 02, 2009
Anniversary Love.
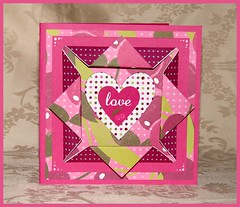
I never know what to do with those chipboard bits.. they always seem a bit too chunky for cards.. but this worked out ok :) Been wanting to try this folded card for a while, its actually v.simple and squishes flat fine for posting. :)
Measurements.
14cm x 14cm blank.
13cm X 13cm matt
11.5 x 11.5 matt
14 cm square, folded into the centre, then out again.
v.simple... ^_^
Measurements.
14cm x 14cm blank.
13cm X 13cm matt
11.5 x 11.5 matt
14 cm square, folded into the centre, then out again.
v.simple... ^_^
Friday, May 01, 2009
Linkage - LJ Feed.
If you would like to have my crafts blog as a feed in your Livejournal Friends Page, then it is available by clicking the link in this post's title, or here -
http://syndicated.livejournal.com/eekersart/profile
(Thanks to Mokie who set it up for me) ^_^
Later edit! I dont know if this work now I have changed my blog name, i'll have to pester Mokes I think to sort it for me.. so message me if you want this set up, else I prolly will leave poor Mokieone in peace :)
Linkage - Ripe Berry Set.
The "Ripe Berry" Paper/Scrapbook Kit I am loving right now is still being demo'd on the QVC website! It's by Colorbok, so I think might only be available through QVC in the UK, not sure tho.. I am hunting it out :)
It only cost me about £13 from the QVC shop in Shrewsbury. I have decided to look out for another one... I just want more of the 12x12 paper, its yummy.
Post title links to demo video.
It only cost me about £13 from the QVC shop in Shrewsbury. I have decided to look out for another one... I just want more of the 12x12 paper, its yummy.
Post title links to demo video.
Wednesday, April 29, 2009
Russian Doll Thank You Cards
More of the thank you cards! Got this fab set of Matryoshka doll stamps from my friend Susan for my birthday. Love them! :) Hero Arts make great stamps.
Recipe: Tall Card Blank, covered with "Ripe Berry" paper, circles made by the cuttlebug. Stamp in black, using water based pens to watercolour them in. Thanks message printed out on the printer, or using one from a magazine freebie sheet. 3D foamed. :)
Recipe: Tall Card Blank, covered with "Ripe Berry" paper, circles made by the cuttlebug. Stamp in black, using water based pens to watercolour them in. Thanks message printed out on the printer, or using one from a magazine freebie sheet. 3D foamed. :)
Kokeshi Thank You Cards
More thank you cards for my birthday presents. I love these kokeshi stamps from "Hero Arts".. its Clarian's Hawk's fault I had to buy them..(and a cuttlebug!)Tried to do a few different version and used water based pens to watercolour them in. Also very nice to use up some of the oriental paper I have stashed.
Recipe: Tall card blank, covered in paper. Cuttlebugged circle and scalloped circle. Kokeshi stamped onto cream paper and coloured in with watercolour pens. 3d foam layers. "Thank you" printed out on printer.
Recipe: Tall card blank, covered in paper. Cuttlebugged circle and scalloped circle. Kokeshi stamped onto cream paper and coloured in with watercolour pens. 3d foam layers. "Thank you" printed out on printer.
Noah's Ark Thank You Cards
Some of my thank you cards I made for my birthday this year. My top friend Toni bought me this fab Noah's Ark stamp from "Time to Sew" for my birthday, so I used it to make her thank you card, and also for my nephew, Arthur.
Its lush... I want to make more of them immediately. :)
Recipe: Tall Card blank, covered in "ripe berry" paper, circle and scalloped circle thanks to cuttlebug, stamped image, coloured in with brush pens. 3d foam. "Thank you" from a magazine freebie page.
Its lush... I want to make more of them immediately. :)
Recipe: Tall Card blank, covered in "ripe berry" paper, circle and scalloped circle thanks to cuttlebug, stamped image, coloured in with brush pens. 3d foam. "Thank you" from a magazine freebie page.
Subscribe to:
Comments (Atom)


