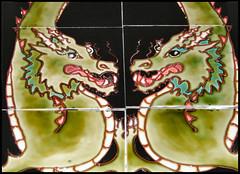
Finally uploaded the pics of my dragon tiles onto flickr. I think they need a bit of touching up before I photograph them to put onto etsy. I'm not entirely happy with the result, I wish I hadnt had them dipped!

Tuesday, May 11, 2010

Thursday, March 11, 2010
Grandad's Birthday
Another batch of cards done, and a few more to upload onto Flickr.
Working on some Easter cards now.
Could do with some inspiration!

Working on some Easter cards now.
Could do with some inspiration!
Friday, March 05, 2010
Cycling Commissions
One of the results of doing commissions for other people, is that their interests may not coincide with your own, and suddenly you are having to think of even more cycling ideas! I've done six recently and am now struggling for ideas!
Anyway, fancied doing something different for this one...bit more modern?
Uploaded another batch of pics onto Flickr, you can get there by clicking on the picture.
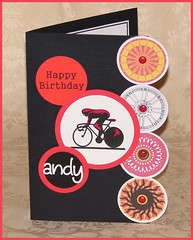
Anyway, fancied doing something different for this one...bit more modern?
Uploaded another batch of pics onto Flickr, you can get there by clicking on the picture.
Thursday, January 28, 2010
Monday, January 18, 2010
Painting for my friends.
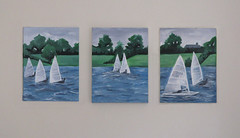
Bit slow on the updates at the moment, but I have got time to just borrow this photo from my friend "T" and show you the painting I did for her and her boyfriend just before Xmas. She supplied the canvas and I painted a waterscape picture, featuring the kind of boats they are interested in, ish. :)
Its a small triptych (3 x 30cmx40cm canvas) and really it was meant to be a stopgap measure to cover a lighting socket issue until they found a piece of art they liked. Its been hard to find exactly what they want, so I thought atleast this would be better than nothing. I think they want to keep it now...
As it I didnt quite get enought time to finish it properly, if they are keeping it, I might take my paints and smooth off some of the rough edges and qwerky issues, I didnt really finish the sky at all!
The middle canvas is twice as thick as the other two. And I had to do a bit of photoshopping to swap the order they were in, cos they were designed to be in this order, but were put up in reverse..it didnt really make much difference tho, apart from to the water line.
They look ok in a thumbnail :)
Its a small triptych (3 x 30cmx40cm canvas) and really it was meant to be a stopgap measure to cover a lighting socket issue until they found a piece of art they liked. Its been hard to find exactly what they want, so I thought atleast this would be better than nothing. I think they want to keep it now...
As it I didnt quite get enought time to finish it properly, if they are keeping it, I might take my paints and smooth off some of the rough edges and qwerky issues, I didnt really finish the sky at all!
The middle canvas is twice as thick as the other two. And I had to do a bit of photoshopping to swap the order they were in, cos they were designed to be in this order, but were put up in reverse..it didnt really make much difference tho, apart from to the water line.
They look ok in a thumbnail :)
Thursday, December 31, 2009
Update
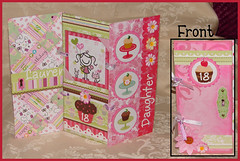
Just uploaded 20 new pictures onto flickr. A few weeks without the ability to upload has left me a long way behind with uploading my crafting pics. This is one batch done anyway. More soon I hope. :) Click on the pic to view the others on flickr.
Sunday, December 13, 2009
Hornsea
Hi, I've been offline for a while as I couldnt get photos off my camera card! Anyway, I now have a good work-around solution and shall be back in the land of the living soon.
In the meantime, here is my new obsessional hoarding collection :)
x
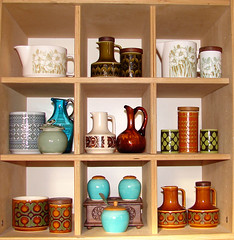
In the meantime, here is my new obsessional hoarding collection :)
x
Tuesday, October 13, 2009
Earring Tutorial
I wanted to send an earring idea to my friend Toni so I have popped it on here, with a bit of a picture to help explain :)
The parts on the right are all that is needed to make the earring on the left. ( There should be five headpins though, I seem to have lost one..)
Recipe.
Put one bead and one spacer on a headpin four times. Put loops at the top of each one making sure that....,
- One has virtually know spare head pin visible, so the loop is up tight to the spacer bead. ( Call this "A")
- Two are the same length (These are "B"s) and the final one is a little bit longer.(C)
Cut the head off one of the remaining headpins and make one end into a loop. Thread on, in order, B, spacer bead, jump ring, C, jumpring, spacer bead, B
.
Now place a loop at the other end of the head pin ( Try and get all the loops facing the same way) and then bend it into a circle. I used a pen ( pictured here.) and just wrapped it around.
Open up a jump ring and slide on, in order,
-One end of the loop
- A
- The other end of the loop
-Earring hook
Close the jump ring and that's it! :)

The parts on the right are all that is needed to make the earring on the left. ( There should be five headpins though, I seem to have lost one..)
Recipe.
Put one bead and one spacer on a headpin four times. Put loops at the top of each one making sure that....,
- One has virtually know spare head pin visible, so the loop is up tight to the spacer bead. ( Call this "A")
- Two are the same length (These are "B"s) and the final one is a little bit longer.(C)
Cut the head off one of the remaining headpins and make one end into a loop. Thread on, in order, B, spacer bead, jump ring, C, jumpring, spacer bead, B
.
Now place a loop at the other end of the head pin ( Try and get all the loops facing the same way) and then bend it into a circle. I used a pen ( pictured here.) and just wrapped it around.
Open up a jump ring and slide on, in order,
-One end of the loop
- A
- The other end of the loop
-Earring hook
Close the jump ring and that's it! :)
Monday, August 24, 2009
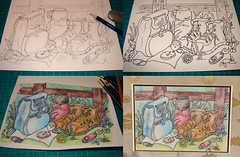
Four stages of an arty card.
1. Sketch in pencil.
2. Pen outlines.
3. Watercolour pencil.
4. Chop, frame and mount on card.
Commissioned card for someone that likes walking/hiking.
2. Pen outlines.
3. Watercolour pencil.
4. Chop, frame and mount on card.
Commissioned card for someone that likes walking/hiking.
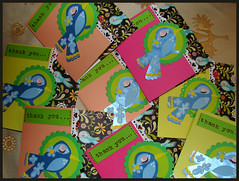
Eight thank you cards.
My partner wanted some thank you cards to send after his birthday. Here they are, based on the bird in the Basic Grey>urban prairie>meadow paper.....
Subscribe to:
Posts (Atom)