Showing posts with label Stencil. Show all posts

Friday, February 28, 2020

Altenew Pansy Cards.

(Catchupmageddon Post) Very pleased to have an Altenew layering flower stamp set to play with! This Pretty Pansies Stamp Set was one of the few I had my eye on, it's proving hard to find the ones at the top of my list.  I chose a couple of layouts and made a simple 7 card set using all the more successful colour combos I tried with the stamps.


Most of the time I used distress oxides or inks with versafine black outlines. I also printed out some photos of real pansies to get some inspo for which colour schemes to try out. Background made using a stencil and distress oxides.


I spot other people get to use their washi tapes on their cards so I had a go too! I used a Hero Arts "messages with flourish" sentiment stamp for most of the "happy birthday" banners.


Some geometric papers from a magazine with a folded corner detail. I like how staples look but I don't think I ever get them quite right, lol! 


Some funky papers I have been saving for something "special" but that time never arrived, decided I needed to use them before they became old fashioned! lol. Sentiment was a freebie set from Making Cards Magazine, it stamps up really nicely.


I think these two came out the best, I really liked the colour schemes. I had a go at making my own background paper using the leaf from the Pretty Pansies set but only used a small piece of it in the end.


Added stickles to the centres of the flowers to make them a bit more special.

And just because it made a colourful photo I thought I would share one of the wrapped up gifts that I added a pansy card too.


Tuesday, February 11, 2020

Baking with Bears

(Catchupmageddon Post) A couple of cards I made using sets from Lawn Fawn and My Favourite Things. The blue card I made as a commission for someone who loves to bake.


In this card I used two Lawn Fawn sets, Bannerfic and Baked with love. I used a stencil from the stash for the back ground and used blue distress oxides. I then assembled the blue table cloth and the elements on top.


All the stamped elements were coloured with copics and some stickles. Spotted paper & sequins were from the stash. 


I also made another card in pinks! This time I included some little bears from the My Favourite Things Bitty Bears set. Also a stencil for the background, elements coloured with copics (and stickles) and paper and sequins from the stash.


I can't resist adding tiny bears to things, what is wrong with me? lol.

Thanks for joining me on yet another catch up post. Back to card making now, I need to make some fresh new cards!


Friday, December 21, 2018

From the stash...

The unused stamp set stash is getting a bit embarrassing, so I thought I should crack on and use another hoarded stamp set that I love! This stamp set is from Mama Elephant and is called Me & My Yeti. (I had my copy from Diestodiefor).


I made two versions, using up almost all of the set between the two cards. I stenciled a background using distress oxides and then cut out and added the elements which were coloured with copics. The greeting is from a magazine freebie set and the background paper is from a Lawn Fawn Perfectly Plaid 6x6 Set.


To add a bit of depth and scenery I used a Joy die called "Mery's Christmas Tree and House Border". I also added some shadow, white posca pen highlights and some stickles glitter.

Sunday, December 09, 2018

A bit of Avery Elle for Christmas

Here are a few Christmas cards I made using two Avery Elle Stamp Sets, Brring On the Joy and Winter Woodland Wonders. I got both sets from Dies to Die for, so links to them there.

Each card uses a stenciled background and topper images coloured with copics. :)


Tuesday, October 30, 2018

I have started on Christmas.

It's not even that early to start is it? I know several people who have already finished their Christmas Makes! Already! But, here I am, still on my first few and I decided to use the Layered Stencil "Plaid" from Witt and Sass to make a feature background for a christmas card.


I used the stencil and distress inks to begin with and then used some texture paste through the stencil afterwards. 


I added some ribbon (freebies from Making Cards Magazine), red rosette (From Helen) and Jolee gingerbread stickers also from Helen (I think she may have had them in her stash for a while!)


I printed out a greeting on the PC in Bernadette Rough and added with 3D Foam. Done!
Thanks for joining me today! I've another Christmas Make using the Plaid Stencil scheduled for Thursday :)

Tuesday, August 07, 2018

Magical Creatures!

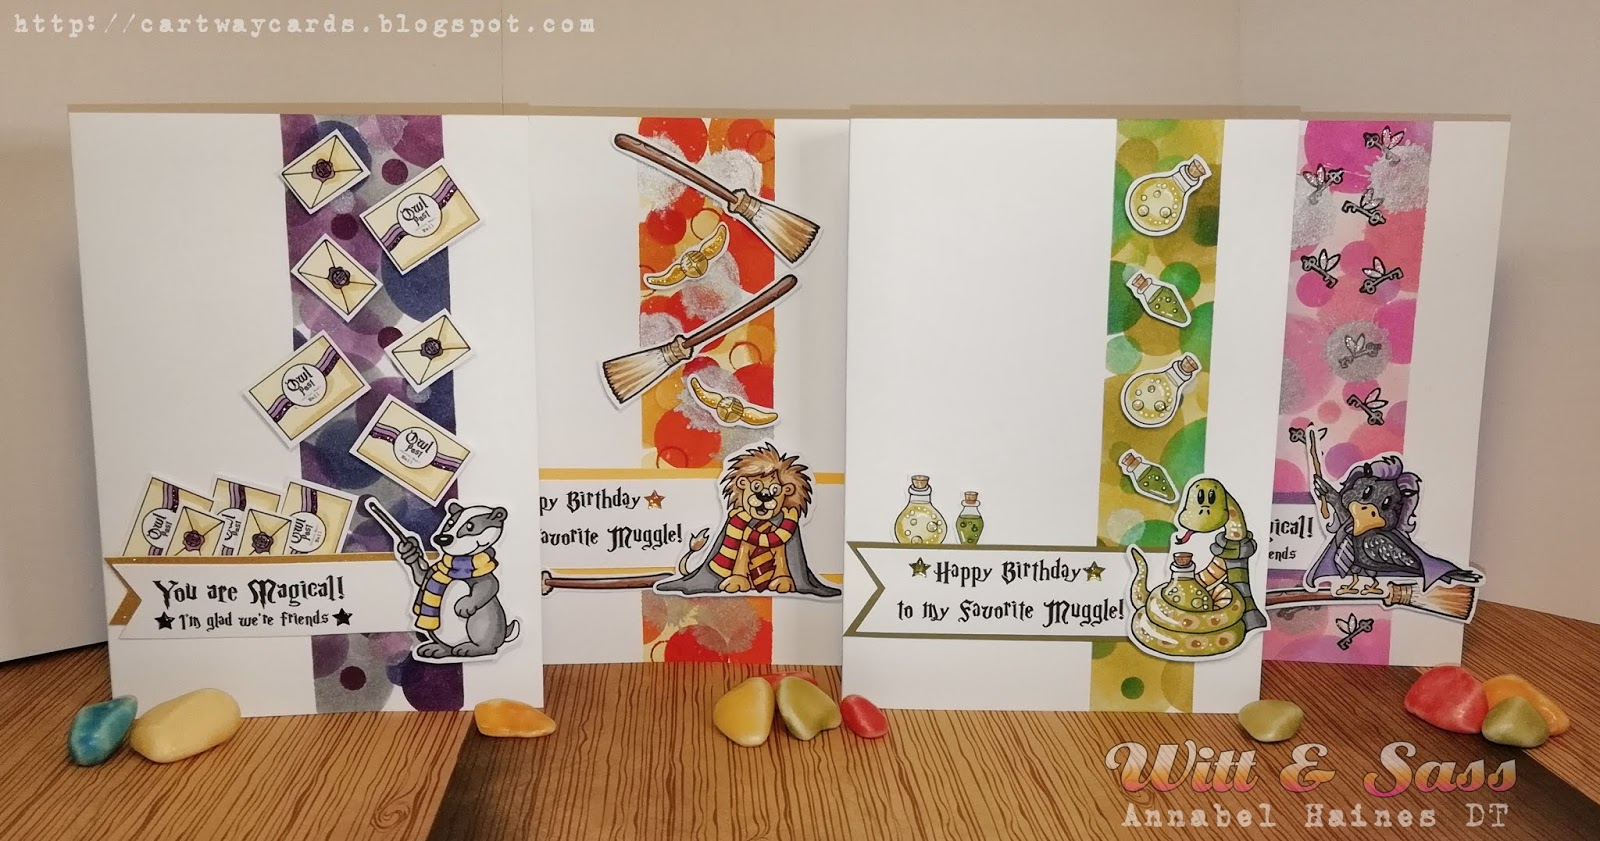
Back here with some new things from Witt & Sass! It's very exciting to share all these new products with you, they are great fun to use, and I really hope my posts convey that! This is the new Magical Creature 4x8 Stamp Set.


I decided to make a CAS card set using the characters and sentiments from this stamp set and some other bits from the freebie digistamp set that goes with them. ( You need to join the Witt and Sass Facebook Group to see them.) 


On each 7x5 card I masked off a section and with Distress Ink and the Witt & Sass Layered Dot Stencil created a bokeh-ish coloured background.


Here the sentiments, Badgerpuff and Leodor are from the Magical Creature Set but the letters and snitch are from the freebie set! I coloured everything with copic pens and dots of White Posca Pen.


I added some stickles and glossy accents to the cards. The silver blobs on the pink card are a silver distress dauber "slammed" onto the cardstock.

Thanks for joining me today. I would also like to share with you that I am hosting the official Witt & Sass Blog now, so perhaps you would like to pop by and have a look at what's going on, sometime?


Friday, August 03, 2018

Chubby Unicorn on a grass knoll

Hi again! It's the fourth project using the Chubby Unicorn 4x8 Stamp Set from Witt & Sass Stamp Company, and this time I also used a couple of the fab stencils you can use to build backgrounds for your feature stamps. I love messing around with stencils!


For this card I used Chubby again in a rainbow outfit, stamped in Versafine Onyx Black and coloured with copic pens. The heart details are also part of the Chubby Unicorn Set.


Then to make the background, I covered a 14x14cm square of card with (Mermaid Lagoon, Salty Ocean and Wilted Violet) distress oxides, layered the "Stencil Layered Clouds" over the top and using a wet wipe removed a layer of the ink and voilà clouds! :D
I then, on a separate piece of card, used the "Stencil BB (Background Builder) Hill" and (Cracked Pistachio, Twisted Citron) distress oxides to make a hillock. I then cut this out and layered it on top of the sky background.


Finally I added a diecut sun and rainbow ring (both nestabilities dies) and a section of flowery paper from the stash (an off-cut from one of the other unicorn cards).
I added some glossy accents to all the hearts (they look like real enamel bling with glossy accents) and some Wink of Stella to the underside of the clouds (through part of the stencil).

Interested in working with stencils? Why not check out the shop to see what is available?


Friday, August 18, 2017

Gelato messing.

Helen recently donated me a very nice Chocolate Baroque Stamp set that has a GIANT Patchwork butterfly stamp in it. I really want to combo it with Gelato's to make a cool card. This has involved a lot of messing about with Gelatos, and believe me, it's very messy!

Last session I managed to have a few left over trial bits that I thought I could make into a quick birthday card. Because the one gelato is metallic, the sheen made it a bit prettier in real life than the pic. It's not an exceptional card, but not bad from leftover messy bits.


This is the smaller butterfly from the stamp set. To make the background I made a swooshy gelato base, layed a stencil over the top and then with a wet wipe rubbed through stencil. This is still prolly the nicest thing I have found to do with gelatos. We are still awaiting the successful giant butterfly card, it hasn't happened yet! :)

Greeting is from Hero Arts - Message with Flourish, I wish it was straight, argh! :)
Stencil from Creative Expressions - Doodle Squares.
Gems from stash.

Monday, June 12, 2017

Family Tree :)

Made this for a bestie who is researching her family tree :) The professions/descriptions relate to various discoveries she has made along the way (Not always as they seemed at first or in this order lol).


I sprayed Cosmic Shimmer sprays over a wooden laser cut tree to make the background. Then I stamped Lawn Fawn Bannerific banners is Memento Ink and coloured them with copics. I added pseudo italic style text by hand. Embellished with a few punched oak leaves to finish.