
First post in a while that isn't a catch-up post! It's a DT day post! And I wanted to re-purpose the Rubber Duckie digistamp from Dr.Digi's House of Stamps and use him for a Christmas card. I really need to work on my Christmas card stash all year round and not leave them til December! lol.
This is a super simple card using the Rubber Duckie digi, it could be even more CAS than I did it but I wanted to share with you how easy it is to use a nicely shaped digi to make a card like this for any occassion. It's always great for using small scraps of cool papers too!

This is what the digi looks like when you download it -

Here are some brief instructions of how I made it.
First of all I create a 16x16cm square on the computer and used an overlay grid to position the ducks. My grid overlay divided the square into a 3x3 grid and I positioned a duck centrally in each section. For the middle section I pasted a small duck and added a circular "Christmas Quackers" greeting. I then printed this out and cut out the eight outer ducks (making duck shaped holes/windows).
(The red lines here are not my grid, they are to protect the digi from theft.)

(If I then only kept the shape around the ducks, leaving just silhouettes it would be very simple to create an svg file and cut it out on the cutting machine!)
I then created a grey box to cover each of the ducks and pasted it into the grid I had made. This is for the correct layout of the scrap papers underneath my ducks.

I then added some extra border to the square making it a 17x17cm card front for the card. By adding a black border on 3 sides I was able to cut it out the right size and score the 4th edge ready to make up my card. (I leave a 2 centimetre overlap and then stick it onto another blank 17x17 cm square to make the card blank).
After I had printed this out I cut out eight 4.5x4.5cm squares from christmas papers. I stuck them on each of the grey squares.
Using 3D foam I mounted the topper, with the duck shape windows directly on top of the papered squares.

I cropped out the sentiment design and reprinted it on a new sheet of paper, and then using my cuttlebug and dies made it into a 5cm diameter circle and from red card a 5.5cm diameter circle to layer it onto.

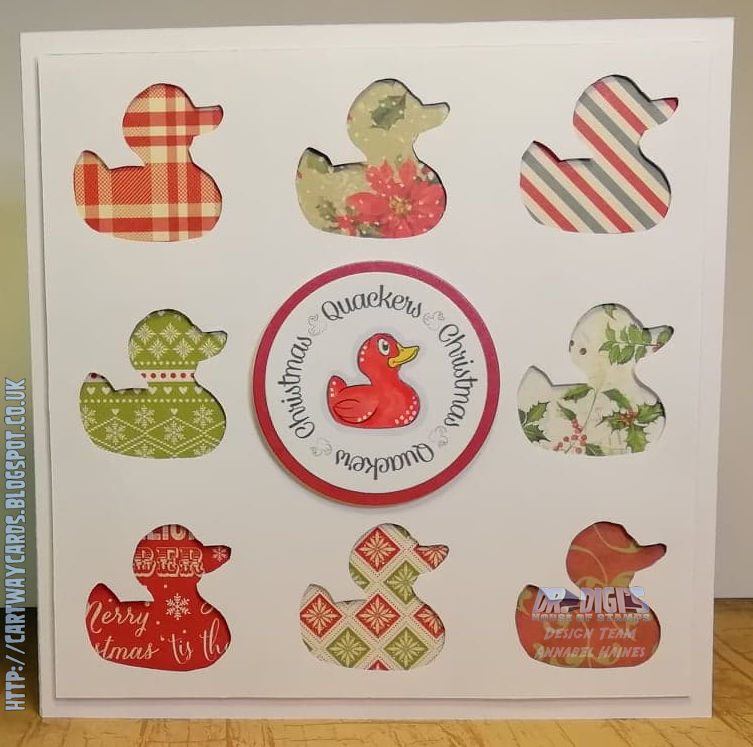
I then coloured in the duck with copics and 3D foamed it into the centre of my card.

Finished Card!

Did you like a post with more instructions and info on how I made it? Tbh, with my coloured cards the process is very obvious and simple but I thought maybe when I use the computer to make a card or a template for lots of cards, it might be interesting and helpful to share?
A brilliant card design Ginny
ReplyDeleteMy Blog As I do Rodos
awww! this is super cute card!
ReplyDelete